
Key Takeaways
- Making mistakes is normal—even experienced stitchers unpick.
- Always assess the impact of a mistake before fixing it.
- Use proper needlepoint accessories like blunt needles and scissors to avoid damage.
- Gently unpick stitches to protect canvas mesh from warping or tearing.
- Learn to prevent future mistakes with lighting, stitch guides, and planning.
- If the canvas is damaged, there are safe recovery techniques you can use.
- Unpicking is part of learning how to needlepoint and builds confidence over time.
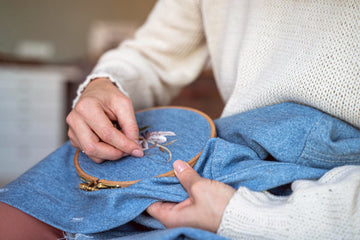
Even the most experienced stitchers drop a stitch, miscount a row, or accidentally tangle their threads. Mistakes are part of the process. What really matters is knowing how to fix them without damaging your beautiful canvas.
If you've ever stared at a wonky line and thought, “Should I just leave it?” you’re not alone. Learning how to needlepoint includes understanding how to safely unpick errors. In this guide, we’ll walk you through exactly how to do that. With the right tools and gentle care, you can recover from a misstep and keep stitching with confidence.
Why It’s Okay to Make Mistakes
Before we get technical, let’s reframe how we see mistakes. Every stitcher—yes, even pros—makes them. Whether it’s miscounting, using the wrong thread, or working in the wrong direction, slip-ups are normal.
In fact, mistakes are one of the best teachers when learning how to needlepoint. They help you build awareness of tension, thread direction, and canvas orientation. Over time, you’ll catch mistakes earlier and fix them faster.
When (and When Not) to Unpick a Mistake
Not every mistake needs fixing. Before diving in with your scissors or needle threader, ask yourself:
|
Ask Yourself |
If YES... |
If NO... |
|
Will it disrupt the final design? |
Unpick it. |
Let it be—consider it charm! |
|
Is it in a highly visible section? |
Better to fix it now. |
You may be able to hide it later. |
|
Will it affect stitch alignment or size? |
Correct it to avoid future issues. |
Might not be worth the trouble. |
|
Are you just being a perfectionist? |
Sleep on it before deciding. |
Give yourself grace and keep going. |
When learning how to needlepoint, knowing when to unpick is just as important as knowing how to stitch.
What You’ll Need

Having the right needlepoint accessories on hand will make unpicking much easier and safer.
Essential Tools:
- Tapestry needle (blunt tip) – to tease out the stitches gently
- Small embroidery scissors – for precision snipping
- Needle threader – for re-threading your needle
- Magnifying lamp or good lighting – helps avoid additional errors
-
Tweezers (optional) – to gently remove loose fibers
These tools aren’t just for fixing errors—they’re staples when mastering how to needlepoint the right way.
Step-by-Step: How to Unpick Needlepoint the Safe Way

1. Pause and Observe
Put your needle down and take a breath. Carefully assess how far back the mistake goes. Try not to panic or rush—impulsive picking can damage the canvas.
2. Loosen the Last Correct Stitch
Using your needle tip or a blunt tool, gently lift the loop of the most recent correct stitch. This opens the path to start unpicking.
3. Work Backwards, One Stitch at a Time
Pull the thread backward through the same path it came in. Don’t yank—this can pull on the canvas threads and distort them.
4. Keep Track of Your Working Thread
If the thread is still usable (not frayed or too short), you can reuse it. Otherwise, snip it off and prepare a new piece.
5. Check the Canvas
After you remove the mistake, check the mesh of the canvas. If it looks distorted, gently push it back into shape with your needle.
Unpicking is a normal part of how to needlepoint, and when done right, it leaves no trace.
Common Mistakes to Avoid While Unpicking
Even unpicking comes with risks! Here are the biggest things to watch out for:
|
Mistake |
Why It’s Risky |
Better Option |
|
Tugging too hard |
Can warp or tear the canvas mesh |
Gently guide the thread back through each hole |
|
Using sharp scissors too early |
Might cut canvas instead of thread |
Loosen stitches first, then snip if needed |
|
Rushing the process |
You’ll likely make more mistakes |
Take breaks, stay calm |
|
Ignoring frayed thread ends |
Can knot and damage nearby stitches |
Snip and discard damaged thread |
Every beginner learning how to needlepoint should learn the art of graceful undoing—it’s just as useful as stitching itself.
Tips to Prevent Future Mistakes
Mistakes are normal, but here’s how to avoid needing the seam ripper every session:
1. Use a Highlighter on Paper Charts
As you complete each section, mark it off. This is especially useful for counted designs.
2. Work in Good Lighting
Poor lighting leads to miscounts and tangled stitches. A daylight lamp is a must-have needlepoint accessory.
3. Use the Right Stitch for the Right Section
Some patterns call for specific needlepoint stitches like tent or basketweave. Read the instructions carefully to avoid doing it twice.
4. Don’t Overload the Needle
Too much thread creates knots. Stick to shorter lengths (about 18 inches) to maintain tension control.
5. Keep a Needle Minder
Helps you rest your needle safely without misplacing it in mid-project chaos.
Knowing how to needlepoint includes knowing how to set yourself up for success—and how to minimize frustration.
Bonus: What to Do If the Canvas Is Damaged

Sometimes, despite your best efforts, a little damage occurs. Don’t worry—there are ways to fix it.
Problem: Stretched Mesh
Fix: Gently massage the area with your fingertips or tap the mesh back in place using a blunt needle.
Problem: Torn Canvas
Fix: Use a patch on the backside with a small piece of fusible interfacing, or reinforce the area with extra stitches later.
Problem: Fuzzy or Frayed Canvas Threads
Fix: Stop unpicking immediately. Stabilize the area and consider restitching with gentle tension.
If you’re serious about learning how to needlepoint, don’t let canvas damage derail you. Mistakes are opportunities for learning and creativity.
Conclusion: Mistakes Don’t Define Your Work—Your Recovery Does
If you’re just learning how to needlepoint, rest assured that errors are part of the process. What counts is how calmly and carefully you fix them. With the right approach, unpicking won’t damage your canvas—it’ll make you a more confident, capable stitcher.
Ready to stitch (and fix) like a pro?
Explore beginner-friendly kits and helpful needlepoint accessories at Atlantic Blue Canvas and keep your needlepoint journey smooth and satisfying.
FAQs: Unpicking in Needlepoint
Q1: Can I reuse the thread I just unpicked?
Yes, if it’s still in good condition. If it’s frayed, tangled, or too short, use fresh thread.
Q2: What if I pull out more stitches than intended?
That’s okay! Just backtrack to your last known correct point and restart. Use stitch guides or markers to help prevent it in the future.
Q3: Should I use a seam ripper for needlepoint?
No! Seam rippers are sharp and made for fabric, not canvas. Always use blunt-tipped needlepoint accessories like tapestry needles or embroidery scissors.
Q4: Is it okay to leave a small mistake if I’m too far along?
Yes. If it doesn’t disrupt the design or structure, it can add character. Many stitchers follow the “one mistake rule”—a reminder that handmade isn’t perfect.
Q5: Does unpicking weaken the canvas?
Not if done gently. However, excessive tugging or repeated unpicking in the same area may weaken the fibers. Be mindful and try not to make a habit of it.