
If you're eager to start how to needlepoint without feeling overwhelmed, there’s no better project than needlepoint ornaments. These small but mighty creations are quick, satisfying, and offer a manageable way to learn, practice, and enjoy your stitching journey.
Not only are needlepoint ornaments ideal for beginners exploring needlepoint canvas and basic stitches, but they also make heartfelt gifts and timeless home decor. Whether you’re crafting a holiday collection, personalized tokens, or keepsake decor for your home, stitching ornaments allows you to create beautiful, finished projects without committing to weeks of work.
In this guide, you’ll discover why needlepoint ornaments are the perfect starter project, ideas for styles that work year-round, tips for designing or choosing your ornament, a clear step-by-step on how to start, and top ornament kit recommendations from Atlantic Blue Canvas to help you get started immediately.
Why Needlepoint Ornaments Are the Perfect Starter Project
- Quick & Satisfying: Ornaments are small and portable, allowing you to complete a project in days instead of weeks. Perfect for busy stitchers who want the joy of a finish without a long wait.
- Ideal for Gifting: Handmade needlepoint ornaments are treasured keepsakes for holidays, birthdays, weddings, or baby showers.
- Skill-Building: Working on a small project helps you learn how to needlepoint efficiently, practicing stitches and thread management without the stress of a large piece.
- Decor That Lasts: Needlepoint ornaments add charm to holiday trees, door handles, baskets, or gallery walls, becoming part of your home's story.
- Budget-Friendly: Because they require less thread and canvas, they’re a low-investment entry into the world of needlepoint.

Styles & Themes That Work Year-Round
While ornaments are often associated with Christmas, needlepoint ornaments can reflect your personality and be used throughout the year.
Holiday Themes:
-
Trees, wreaths, stars, reindeer
-
Festive sayings (“Joy,” “Peace”)
Florals:
-
Simple flowers for spring
-
Wildflowers or leaves for year-round
Animals:
-
Pets, woodland creatures, or birds
Monograms & Initials:
-
Create personalized gifts or family sets
Abstract & Modern:
-
Geometric shapes
-
Color-blocked designs
-
Minimalist patterns
Special Occasions:
-
Wedding or anniversary date ornaments
-
Baby’s first Christmas or birthday
These designs make needlepoint ornaments a fun, flexible craft that matches your aesthetic while providing endless possibilities for creative expression.
Tips for Choosing or Designing Your Own Ornament
Before you begin, consider these factors to ensure your ornament project is smooth and enjoyable:
1. Canvas Size:
Choose a needlepoint canvas size that aligns with your comfort level:
-
13 mesh: Larger holes, easier for beginners
-
18 mesh: Smaller, more detailed but requires finer thread
For ornaments, most projects are around 3”–5” in diameter or height.
2. Thread Type:
Use wool or cotton for durability, or silk for a sheen finish if you want a luxurious look. Metallic threads can add sparkle for holiday designs.
3. Finish Style:
Decide if you want a round, square, or custom shape and if you will:
-
Add ribbon for hanging
-
Sew on a fabric backing
-
Use cording or binding stitch for the edge
4. Design Choice:
If designing your own, sketch your pattern to fit the ornament size. Keep it simple with 3–5 colors for easy stitching.
5. Start with Kits:
Using beginner needlepoint kits for ornaments removes the guesswork of matching canvas, thread, and colors, helping you focus on your stitches.

Step-by-Step: How to Start a Needlepoint Ornament
Step 1: Pick a Kit or Design
Start with a kit or design that inspires you. If you’re a beginner, a kit ensures you have the right needlepoint canvas, thread, and color guide.
Step 2: Prepare Your Canvas
Mount your canvas on stretcher bars or a frame if you prefer tension while stitching. Cut your thread to manageable lengths (about 18 inches).
Step 3: Begin Stitching
Start with the tent stitch or basketweave stitch to cover the background, then move to detailed areas. Work in sections to avoid tangling.
Step 4: Fill in Details
Once the base is complete, add any decorative stitches or metallic threads for highlights.
Step 5: Back and Finish Your Ornament
Cut your canvas, leaving a small edge around your stitching. Finish using your chosen method:
- Sew fabric backing with light stuffing
- Use felt and whip stitch around the edge
-
Add cording or ribbon for hanging
Your ornament is now ready to display or gift!
Top Ornament Kits from Atlantic Blue Canvas
Ready to start? Here are three needlepoint ornaments kits that are beginner-friendly, fun, and beautiful:
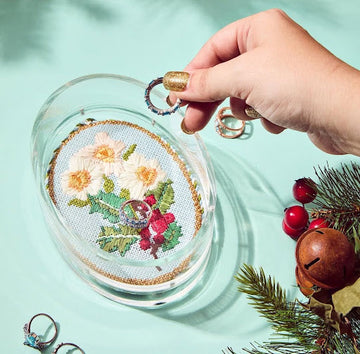
1️. Greens Are Good For You Stitch-Finished
A charming ornament design that is great for year-round display with greenery and fresh colors. Pre-finished for immediate display after stitching.
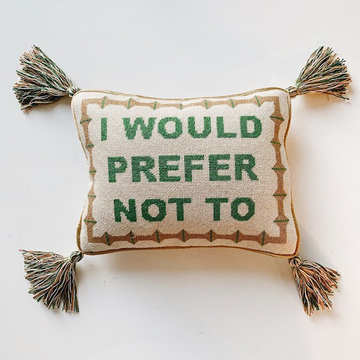
2️. Please Leave By 9 Stitch-Finished
Add humor to your decor with this witty ornament that’s perfect for beginners wanting to practice clean lettering.
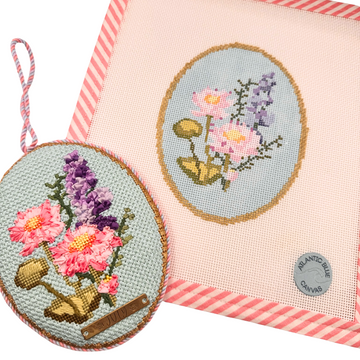
3️. Grandma’s Roses Round
A floral ornament featuring delicate roses, allowing you to practice color blending and clean stitching on a small scale.
Each of these kits includes your needlepoint canvas and carefully curated thread to match the design, making them perfect as your first project or a quick weekend craft.
Conclusion & CTA
Needlepoint ornaments are the perfect gateway into the world of stitching: they are fun, fast, and functional. Whether you want to add a handmade touch to your decor, give thoughtful gifts, or explore how to needlepoint on a small scale, ornaments are the ideal project.
Ready to start your ornament journey?
👉 Explore beginner needlepoint kit guides
👉 Browse our ornament canvases
👉 Join our stitch-along newsletter for ornament challenges, tips, and community stitching fun.
Embrace the joy of completing a beautiful, lasting piece of art—one ornament at a time.
FAQs
Can I personalize a needlepoint ornament?
Yes! Add initials, dates, or small motifs to your design to create personalized gifts or family keepsakes.
How long does an ornament take to complete?
Most needlepoint ornaments can be completed within 5–10 hours, depending on the complexity of the design and your stitching pace.
What stitches should I use for an ornament?
The tent stitch is perfect for background coverage, while the basketweave stitch can help prevent canvas distortion. Decorative stitches like French knots can be used for accents.
Do I need a frame or hoop for an ornament?
While not required, using a frame or stretcher bars can help keep your needlepoint canvas taut and your stitches even.